Garage Cabinet Systems are coordinated storage units designed to bring order to a space that often collects tools, sports gear, cleaning supplies, and seasonal items. They may include wall cabinets, base cabinets, drawers, shelves, and work surfaces. Materials and finishes vary, from painted steel to wood-based panels. The right setup depends on what you store, how often you use it, and the space available. Measure carefully. A cabinet that blocks a car door or hides a wall outlet can create new problems instead of solving old ones.
Professional organizer Peter Walsh has said, “Clutter is not just the stuff on your floor. It’s anything that stands between you and the life you want to be living.” That idea helps explain why garage storage is about more than adding boxes with doors. A useful system keeps everyday items visible and reachable while giving less-used equipment a defined place. For example, a cabinet beside a workbench can hold drill bits and safety glasses, while a higher shelf stores camping gear. Small details matter. So does the household’s real routine.
No single layout suits every garage. Cabinet depth, wall construction, moisture, and changing storage needs all deserve attention before installation. A polished showroom can make a system look effortless; daily use may reveal awkward corners or wasted space. That is worth considering. Understanding these trade-offs makes it easier to compare Garage Cabinet Systems and choose one that fits both the room and the people using it.
What Are Garage Cabinet Systems?
What Defines a Garage Cabinet System? Cabinets, Worktops, and Accessories
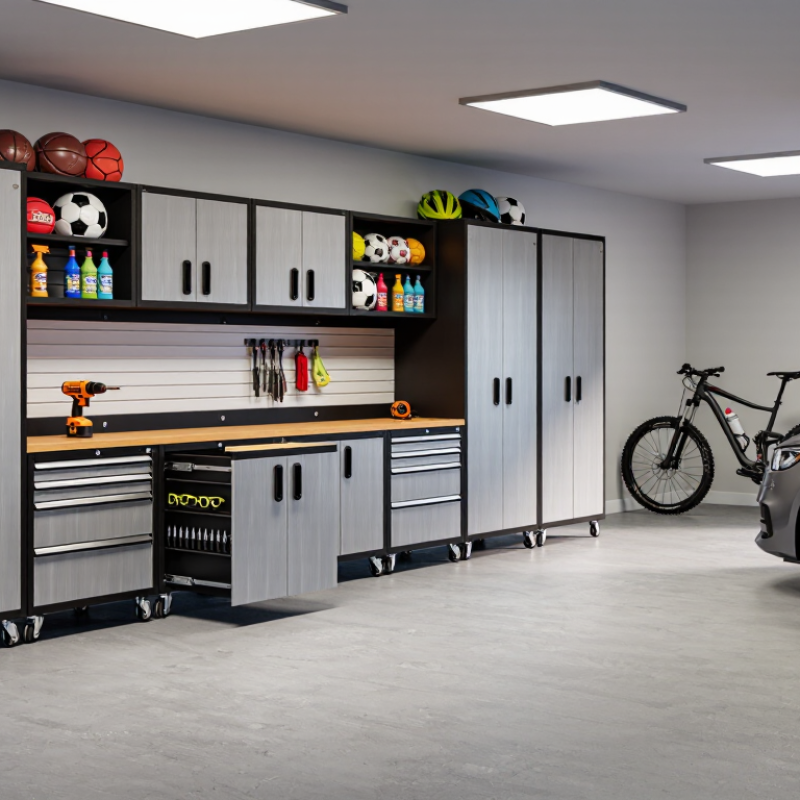
A garage cabinet system combines storage cabinets, a worktop, and accessories into one organized workspace. Cabinets may include tall units for brooms, wall-mounted cupboards for smaller supplies, and base cabinets for heavier items. Together, they help keep tools off the floor and make frequently used gear easier to reach. That matters. A system works best when its layout matches what you actually store, not an idealized workshop.
The worktop provides a stable surface for repairs, sorting hardware, or charging tools. Check its depth and height against the tasks you do; a surface that looks generous in a showroom may feel cramped beside a vehicle. Accessories such as drawer dividers, hooks, bins, and task lighting add useful detail. They are not essential for everyone. Before choosing them, measure the wall, note door and vehicle clearances, and consider where electrical outlets sit. A common mistake is selecting cabinets before checking those details, then discovering awkward gaps or blocked access. Wall cabinets also need suitable mounting points and installation suited to their load. The system can make a garage more orderly, but it will not fix every storage habit. A little friction remains.

Garage cabinet systems combine base, wall, tall, and overhead units to use different parts of the same footprint.
A 2017 survey by the National Association of Productivity and Organizing Professionals found that half of respondents considered the garage their home’s most disorganized area. The figure points to a practical need: storage should make frequently used items easy to reach, not merely hide clutter.
Base cabinets suit heavy tools, paint supplies, and bins that benefit from a sturdy work surface above them. Keep the top clear enough for repairs, and leave room for doors to open beside parked vehicles.
Wall cabinets lift small parts and seasonal gear off the floor. Mount them where you can reach the contents safely, without stretching over a bench. Small, but useful.
Tall units can hold long-handled tools, folded chairs, or cleaning equipment. Check ceiling height, door swing, and nearby switches before choosing their location.
Overhead cabinets or racks reclaim space above a vehicle or work zone, but they need secure installation and careful loading. Measure twice.
A tidy plan can still fail when a cabinet blocks a car door or hides an electrical panel. Sketch the vehicle’s parking area, walking paths, and the largest stored items before deciding which formats belong on each wall.
Garage cabinet material specifications affect how doors close, shelves hold tools, and finishes survive damp air. ASTM A1008 covers cold-rolled carbon steel sheet, including requirements for grades and mechanical properties. A specification should name the grade and thickness, not simply say “steel.” That detail matters. A thin panel may flex under a toolbox, even when its surface looks sturdy.
The World Steel Association reported 1.89 billion tonnes of crude steel production worldwide in 2023, reflecting steel’s extensive industrial use. But production volume does not establish cabinet quality. Buyers should check the steel gauge, coating, welds, and load rating. ASTM A1008 identifies the sheet material; it does not, by itself, certify an entire cabinet system.
For MDF components, ANSI A208.2 specifies grades and performance requirements for medium-density fiberboard. USDA Forest Products Laboratory guidance notes that wood-based panels respond to moisture, so garage humidity deserves attention. Ask for the panel grade, thickness, and formaldehyde-emission documentation, then inspect exposed edges and sealed faces. A smooth sample can still conceal weak edge protection. I would also question any specification that lists “MDF” without a grade; it leaves too much unsaid.
A shelf-load rating is useful only when its measurement basis is clear. Ask whether the figure describes an evenly distributed load or a single heavy object. A 100-pound rating, for example, converts to about 45.4 kilograms using NIST’s Special Publication 811 conversion factor. That does not mean a compact toolbox can safely sit anywhere on the shelf. Concentrated weight can stress the center, brackets, or fasteners more than evenly spread boxes do.
Check the rating for each shelf, not just the cabinet’s total capacity. ANSI/BIFMA X5.9-2019 sets out tests for storage-unit strength and durability, but it does not provide one universal load rating for every garage cabinet. Ratings depend on shelf material, span, support design, and installation. Look for the stated test conditions and whether the figure applies to a static load. Leave a margin below the published limit, especially for items that shift during use. I would still recheck the wall fixings; a shelf label cannot describe every installation. That detail matters. A short span with two sturdy supports may behave differently from a wide shelf with the same rating.
| Capacity measure | How it is measured | Example value | How to interpret it |
|---|---|---|---|
| Published shelf load | Weight supported by one shelf, usually stated by the cabinet maker in pounds (lb) or kilograms (kg). | 50 lb (22.68 kg) | This is an example conversion, not a rating for every cabinet. Check the specific cabinet’s published load limit. |
| Shelf load conversion | Convert pounds to kilograms using 1 lb = 0.45359237 kg. | 100 lb (45.36 kg) | Use the same load value in either unit; rounding may cause small differences in displayed conversions. |
| Higher shelf-load example | Convert the stated shelf load from pounds to kilograms. | 150 lb (68.04 kg) | This is a unit-conversion example, not a universal standard or guarantee of cabinet performance. |
| Load distribution | Determine whether the published rating applies to a load spread evenly across the shelf or to a concentrated load. | Rating conditions vary by product | Unless the product documentation says otherwise, do not assume a shelf can support its full rated load concentrated at one small point. |
| Individual shelf versus whole cabinet | Compare the rating for each shelf with any separate maximum load stated for the entire cabinet. | Check both published limits | A cabinet’s total capacity is not necessarily the sum of its shelf ratings; the cabinet body, supports, and installation also matter. |
| Storage volume | Measure usable interior width × depth × height; express the result in cubic inches, cubic feet, or liters. | Volume describes space, not supported weight | A large interior volume does not mean the shelves can carry a proportionally larger load. |
| Installation and anchoring | Follow the product’s installation instructions and account for wall type, fasteners, and whether the cabinet is freestanding or wall-mounted. | Requirements vary by cabinet and wall | Published shelf loads do not replace installation requirements or any separate cabinet, mounting, or wall-load limits. |
| Capacity figures shown as examples are mathematical conversions, not product-specific ratings. Always use the load limits and conditions published for the exact cabinet system. | |||
Garage wall units transfer weight through their mounting rail, fasteners, and wall framing. The 2021 International Residential Code, Table R602.3(5), includes prescriptive stud-spacing options such as 16 and 24 inches on center, subject to wall conditions. Measure actual stud centers; corners, openings, and repairs can disrupt the expected pattern. Small detail. Big consequence.
Choose fasteners with published allowable loads for the specific substrate and installation. ICC-ES evaluation reports document performance for evaluated products, but ratings depend on factors such as embedment, wood condition, and load direction. A fastener’s headline capacity is not automatically the safe capacity of a complete cabinet installation. Find the studs, use the specified screw length, and anchor each mounting rail at the locations required by its installation instructions. Do not count drywall alone as structural support.
Tips: Scan, then confirm each stud with a small pilot hole. Check that the fastener enters solid framing, not a stud edge. Keep screws level, and avoid overtightening; crushed wood can weaken the connection. If the rail misses a stud, pause and revise the layout rather than improvising. One frustrating measurement now beats a cabinet that pulls loose later.
For a 96-inch wall run with a stud at each end, 16-inch on-center spacing gives 7 stud positions, while 24-inch on-center spacing gives 5. Actual framing can vary, so locate and verify studs before installation. Anchor wall units into framing with fasteners whose published ratings and installation requirements suit the wall material and expected load; stud spacing alone does not determine load capacity.